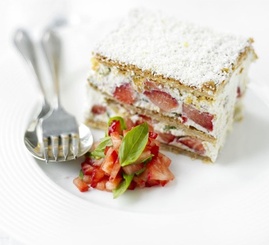
Strawberry & White chocolate Millefeuille
For my second recipe from chef Gordon Ramsay I decided to make a strawberry and white chocolate millefeuille. I chose this recipe really only because the picture looked really good and I love strawberries and white chocolate.
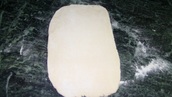
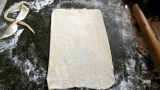
First you have to heat your oven to 200 degrees. While it's preheating you want to roll out the pastry you got into a rectangle.
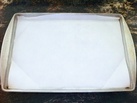
Then you line a large baking sheet with parchment paper and sprinkle it with sugar. You can use the rolling pin to lift the pastry onto the baking parchment.
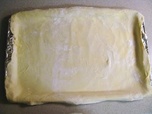
After this you spread more caster sugar over the pastry and cover it with another sheet if parchment paper.

You'll lay another heavy baking sheet on top ( or if you don't have a heavy one you can use something to weigh it down ), and bake it for 25-30 min or until the pastry is golden and crisp. Set it aside to cool.
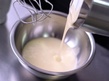
When you're making the filling, pour the cream into a bowl with 3 tbsp. of sugar and the vanilla seeds. (This is not my picture didn't have a picture of this step sorry)
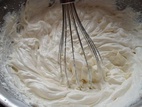
Lightly whisk until the cream just holds it's shape and then set aside.

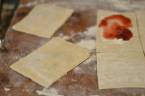
After this you quarter the strawberries and you're supposed to set some aside for the salad but I didn't make the salad so I didn't need to so that. Then you cut the rest
into 3 or 4 chunks.
into 3 or 4 chunks.

At this point, you're supposed to finely shred the basil. I left this ingredient out because I didn't have it. Then fold it into your cream with your strawberries and the lemon zest. Chill until needed.
When the pastry has completely cooled, you trim the edges to help make a neat rectangle that should be 28x30 cm.
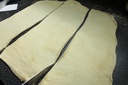
Cut that into 3 equal rectangles, or as close as you can get them to equal.
To make the millefeuille, add half of the cream mix the top of one of the rectangles.
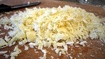
Put the second rectangle on top and finely grate half the white chocolate over that one. Then I put the rest of the cream mix on top of the chocolate.
And then put the last rectangle on top.
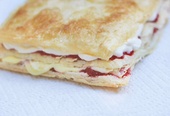
Then I smoothed the filling along the sides and put more chocolate on the top. (This one I forgot to take a picture of so I just put this one)
Then I smoothed the filling along the sides and put more chocolate on the top. (This one I forgot to take a picture of so I just put this one)
Mine didn't really look like the picture but it still turned out I guess. This is what it looked like in the end.
|

|
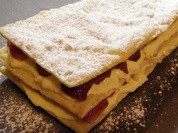
So this is what it was supposed to look like ... And this is what it actually looked like...
